Social Icons

Sunday, July 5, 2015

20-year-old Trojan King Revealed, Maker of over 100 Banking Trojans

A 20-year-old Brazilian kid has been revealed as the maker of more than 100 banking trojans by the security firm Trend Micro. He is known online by the name of ‘Lordfenix’, ‘Filho de Hacker’ and ‘Hacker’s Son.’
The security firm writes that a 20-year-old college student from Tocantins, Brazil known by the name Lordfenix has become Brazil’s top malware maker. He has developed this reputation by giving birth to more than 100 online banking trojans. Most of these banking trojans were sold by him for about $300 each.

He is a computer science student who earned this money between April 2013 and targeted banks like Bank of Brazil, HSBC Brazil and Caixa. He began his career by asking for hacking advice in forums and today he is found offering free version of highly-efficient banking Trojan source code to the forum members in the underground world.
One of the Trojans detected called TSPY_BANKER.NJH identifies and wakes up when a user enters its target banks’ URL. Then it closes the active browser window and displays an error message to open a new fake browser windows. This is so smooth and unnoticeable that user doesn’t have a clue.
Now the user enters the login username and password in the fake window and the trojan sends back the information to the attacker. For more protection, the trojan terminates the process GbpSV.exe associated with the popular security software G-Buster Browser Defense, a security program used by many Brazilian banks.


Lordfenix claims that these free versions can steal credentials of bank customers of four different banks. On the other hand, the paid $300 versions target more banks using the tricks to disable the popular security software popular in Brazil. The security company has posted a picture of programmer’s Facebook page that shows a big pile of local currency on his bed.

Lordfenix-banking-trojan-hacker

Apart from his expertise in this area, the other factors that helped Lordfenix were the facts that more than half-population of Brazil uses internet for transaction and dealing with digital crime isn’t a top priority in the country.

Did you like this story about the 20-year-old Trojan King? Tell us in comments.

Image: David Goehring/Flickr
Thursday, May 21, 2015

How To Capture Someone’s Picture Who Tries To Unlock Your Phone

Some things are better if kept private. I have seen many people hating it like anything when their friends or family members try to unlock their smartphone without their permission. And sometimes due to lots of successive incorrect attempts, the phone gets hard-locked – that means the only way to unlock your phone is via your email. This is enough to irritate a person. Also, you can not do anything about it because you don’t know whom to yell at.

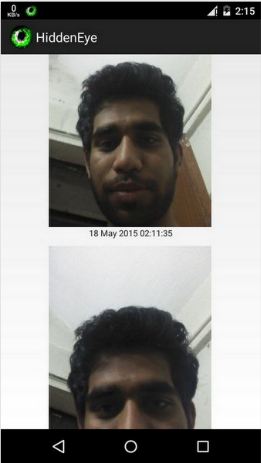
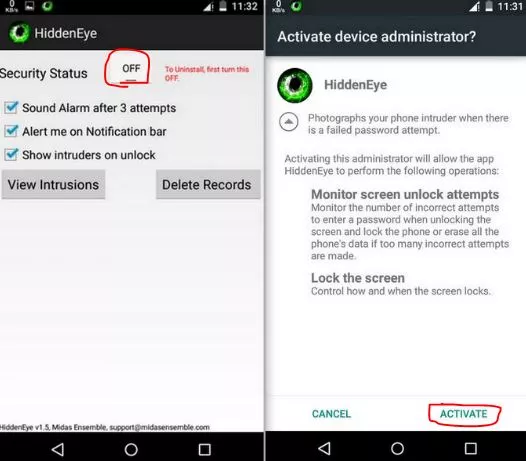
Today, I am going to tell how you can capture a photo of that intruder who tries to unlock your phone without your permission. The only thing you have to do is to download and install this free Android app called Hidden Eye. Hidden Eye once installed will capture a photo of the intruder each time he/she tries to unlock your device.

How Hidden Eye Works?

It’s very simple to use the Hidden Eye app: just open it and tap on the OFF button which is located at middle and then tap to ACTIVATE it. Now tick the options on which you want to get alerted, and this is it.

Hidden Eye app work on a very simple idea- each time intruder tries to unlock your device, it will capture an image of him/her which you can see by tapping on View Intrusions. You can also see the date and the timing below the image captured by app.

hidden-eye-on

If you have turned on the first option, your phone will ring after 3 attempts with the default ringtone. With enabling the second option, you will get to see the intrusion in notification bar. And if you enabled the third option, you will get to see the intruder’s image at the time of unlocking your phone.


hidden-eye-photos-save

Anonymous Hijacks Thousands of Insecure Routers to Power Its DDoS Tools

anonymous-hacks-routers

Lack of some elementary security measures can risk your router’s security and this has stemmed to grow into a large-scale denial-of-service (DDoS) attacks using these hacker-controlled routers. A web security firm Incapsula has discovered a new router based botnet Mr Black while investigating some DDoS attacks against its customers since this December.
 
Hackers exploited routers’ negligent security measures to launch these attacks all over the world. According to this report published by the security firm, the routers made by Ubiquiti Networks had DDoS malware installed on them.

The routers were not hacked due to some vulnerability in the hardware. Instead, it happened because of the deployment of the router in an insecure manner that exposed their management interfaces using the default credentials over SSH and HTTP.

The routers that were inspected were found to have 4 versions of Mr Black, a DDoS program and altogether thirty-seven variations of Mr Black were detected. Other DDoS programs included DoFloo, Mayday and Skynet (a remote sensing tool).

In some earlier versions of the report, Incapsula said that it believed that the hacktivist group Anonymous was one of the few groups those used the compromised routers. It is yet not clear that why Anonymous was highlighted in the report, but it is certain that few people who call themselves “Anonymous” were using the routers. The original article on the Daily Dot was edited to remove the fact that botnet directs to irc (dot) anonops (dot) com.

Total 40,269 different IP addresses were detected from 1,600 ISPs spread across 109 countries. The main affected countries were Thailand (64%), Brazil (21%), United States (4%) and India (3%). To control these routers, 60 servers were hacked and majority of these were in China and the U.S.


To save themselves from the DDoS attacks, users must make sure that their routers’ management interfaces aren’t exposed over HTTP or SSH to the internet. They can also use some tools available to scan their router’s IP for open ports and change their default login credentials.

Thursday, May 14, 2015

Know How Easy It Is To Lose Your Important Data From SSD

solid-state-drive-ssd

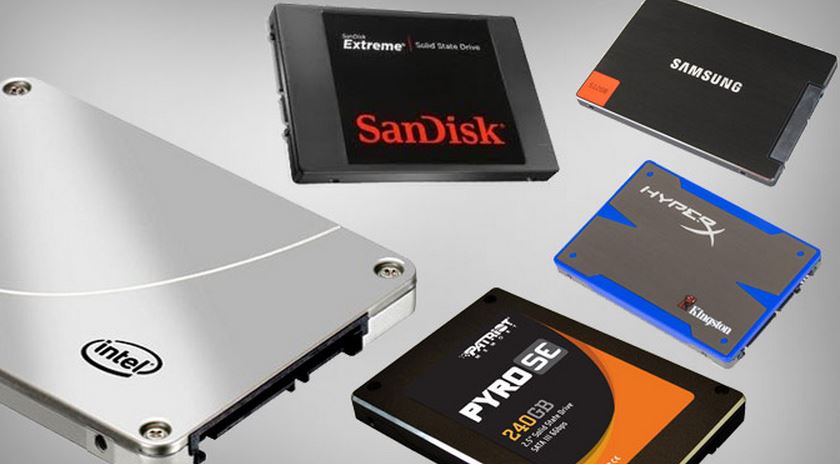
According to a new research in the data storage field, new solid-state drives are prone to data leakage over time. These hard drives are faster and have more storage size but all of them have a major flaw associated with its basic property, that it will eventually lose its data if it is not powered regularly or for few days.
A solid state drive (SSD) (also known as a solid-state disk though it contains no actual disk nor a drive motor to spin a disk) is a data storage device that uses integrated circuit assemblies as memory to store data persistently. We all know SSD’s qualities over regular hard drives and we normally think that it will last forever even if we smash it with hammer or pour acid on it.
The basic reason behind this flaw is the non-regulated and unmaintained temperature. The real problem is the time after which it will lose data. For different scenarios the time taken is also different – it can take months, or sometimes few days and then it’s gone.
Nobody needs the details on how important your stored data can be sometimes. Think as it is a legal evidence and it will go after two years in court as in India (blame the slow India judicial system) and suddenly you noticed that all data is gone or think of an instance suddenly all of your Facebook images are gone simply because Facebook stored it in SSD and forgot about it. But, it will not happen as Facebook have their separate cold storage facilities to outrun this problem.


A recent presentation is given by Alvin cox, Seagate’s engineer at Joint Electron Device Engineering Council seminar. He warned that the period of time data is retained on some solid-state drives is halved for every 9°F (or 5°C) rise in temperature where it’s stored. It means that if the solid state drive is at normal room temperature which is 25°C then it’s okay but if the temperature goes somewhat 5°C high, then half of your data will be gone.
Now all the guys living in desert areas might be thinking that why they still have their data safe. You don’t lose your data that easily if you are regularly giving power to it or maintaining the temperature by using it. Or, you are using some high-end SSD, which we all are using in our MacBooks or gaming laptops then it will have around two-year life span. So, for two years, your data will be safe even if you change the temperature or not.
But enterprise solid state drives are the most affected ones. These drives are having the data loss problem pretty severely. So for the companies who value their data or work on their stored data, it’s a big problem. The one and only reasonable solution to this is to make its copy on mechanical disk. Or else you might lose your data without knowing about it.

Save Your Eyes From Computer Strain Using f.lux for Windows, Mac and Linux

flux-eyes-strain
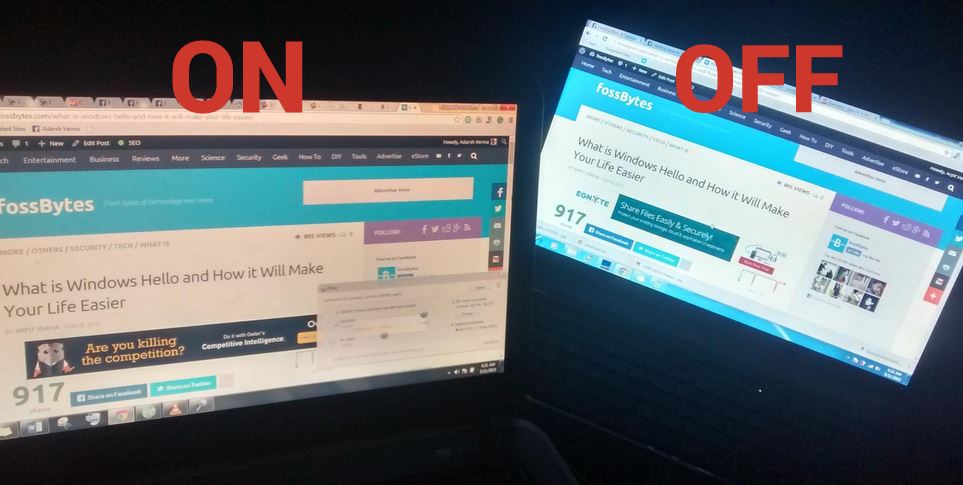
No more watery eyes, when you wake up from sleep in the middle of the night to work on your bright computer screen. Your eye savior, f.lux is here. First things first, what is f.lux and why do you need it?

Why do you need f.lux ?

Decreasing the brightness is not that attractive an option, because the blue light emissions from your screen is still significant enough to well up your eyes with water and completely ruin your sleepy state. It is proven that exposure to blue light significantly aids in keeping you awake for a longer time in the night.
To get to the science behind it, here’s why. Most of us don’t know this, but there is another kind of receptor cells beside rods and cones in our retina. It’s called Melanopsin. The discovery was made about 15 years ago. Melanopsin is sensitive to narrow band of blue light in 460-480 nm range. Melanopsis works different functions for different creatures, but that’s another story.
There are two things I’d like to recommend to your reading list to get more information about melanopsin and effect of blue light on sleep:
1) Internal Time by Til Roennberg
2) Research Papers and articles – link

What is f.lux what does it do?

f.lux is a desktop applet for Windows, Linux, Mac, iPhone, iPad and iPod touch which limits the glow of your screen. Instead, it replaces that with a warm tone. There is no problem for your eyes not to feel comfortable on the screen in the morning. The daylight is sufficient and doesn’t let your eyes feel the glow that the screen throws. But say at 11 PM while you are, say trying to work late after sneaking on your father or wife, you power up your computer and you get instantly taken back by the brightness!
You can reduce the brightness and contrast to a certain extent, but there is a limit to which you can go without compromising your experience. f.lux comes to rescue here. It automatically switches to a warm tone at night and goes back to a brighter shade in the morning.
Don’t worry as it uses only 3.86MB of RAM approximately, is completely free, has no CPU load and works like a charm without any user interference. The working is also fairly simple. You can also customize the way it works, especially how warm you want your screen to be at night.

How to use f.lux to save your eyes?

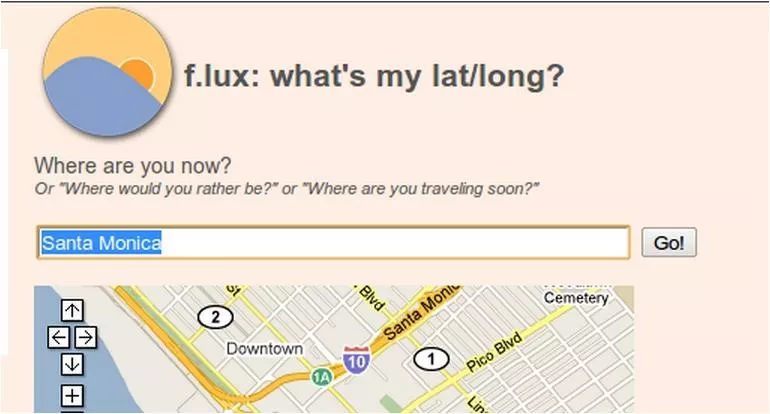
It does the work by calculating your present location (through google maps)and works according to the sunrise/sunset cycle. The f.lux indicator applet automatically manages the color temperature of your screen based on your latitude and longitude, or if you are in the US, your zip code.
flux-save-your-eyes
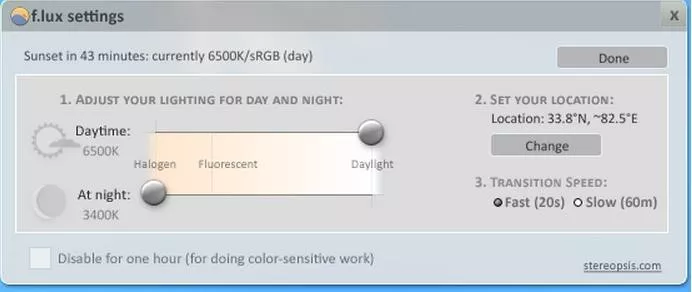
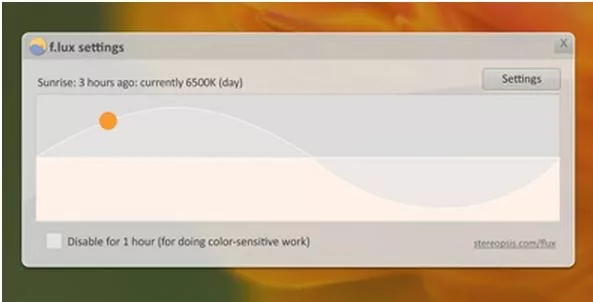
In the preferences panel, you can set your preferred night-time color temperature and see a preview, as well as seeing the current color temperature.
flux-save-your-eyes-1
flux-save-your-eyes-2

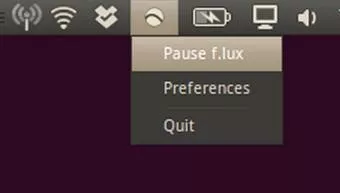
You can even pause the applet if you want to:


flux-save-your-eyes-3

You can download f.lux for windows here and for Mac here.
For iPhone, iPad and iPod Touch you need to jailbreak your device in order to install it. You can follow the instructions here.
To install f.lux on Linux (Ubuntu) open up the terminal and copy paste the following commands one by one.

If you are having an error in adding the ppa (the first command), follow this link to troubleshoot it.
The Linux GUI of the f.lux applet doesn’t provide as much customizing options as that of the other platforms, so if you are interested in adding features to it, you could do it on its open source code on GitHub.

If you have any other query regarding f.lux, comment your queries below. Do share your experiences.

Easy-to-use TunnelBear Chrome Extension Brings VPN Services to Everyone


tunnel-bear-vpn-chrome-
TunnelBear is one of the most loved VPN (Virtual Proxy Network) services because of its simplicity and clean interface. Now, the company has decided to make this service even handier by launching an extension for your Google Chrome browser. So, now you can maintain your privacy more easily.
Keeping aside the advantages of the anonymity, VPN services are of interest to those who are in the countries where some services like Spotify, Netflix aren’t available or some of the services are blocked. After installing the extension, the free users will get 750MB, but TechCrunch writes that TunnelBear will soon offer 1GB.
Currently, this VPN extension is available only for Google Chrome. TunnelBear plans to release the extension for other browsers including Safari, Firefox and more.
In an interview with TechCrunch, TunnelBear co-founder Ryan Dochuk said: “Our goal is to make [using a VPN] as easy and accessible as possible. The extension is so fast and so easy that you should be using it in your everyday internet activity.”

tunnel-bear-vpn-chrome

This TunnelBear extension for Chrome isn’t a full-fledged VPN. It doesn’t handle data only from your browser instead of your entire system. So, for browsing purposes and watching Netflix in the unsupported countries, it is a good option.
TunnelBear, based in Toronto, was founded in 2011 and provides its service to 5 million people all over the world.
Here are some of the services provided by the TunnelBear extension for Chrome:
  • Stop web sites and advertisers from tracking you.
  • While using public WiFi, secure your browser’s identity.
  • Free data every month.
  • Take the advantage of a fast VPN private network with connections to 14 countries.
I’ve installed and used the TunnelBear extension for Chrome and it does what it needs to do. It should be noted that it uses the AES 128-bit encryption instead of the better AES-256 encryption used by the usual TunnelBear app.

Try it out from the link given below:
TunnelBear for Chrome

Do you use VPN services? Tell us in the comments below!

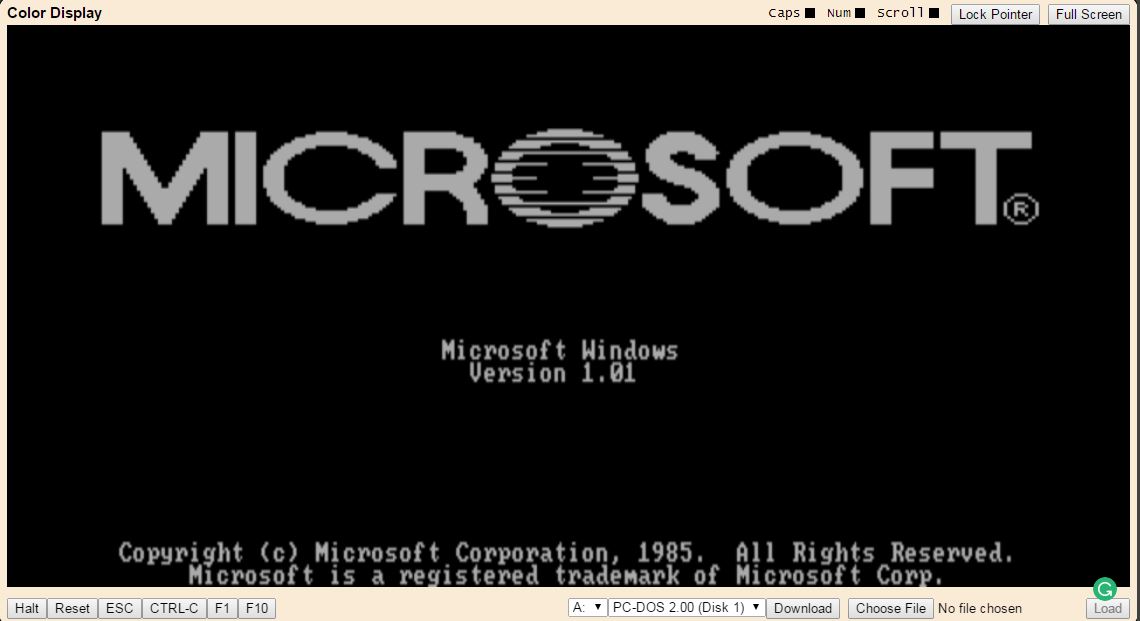
Disliking Windows 10? Run Windows 1.01 in Your Browser Right Now

What's This?
 
microsoft-1.01-online-browser

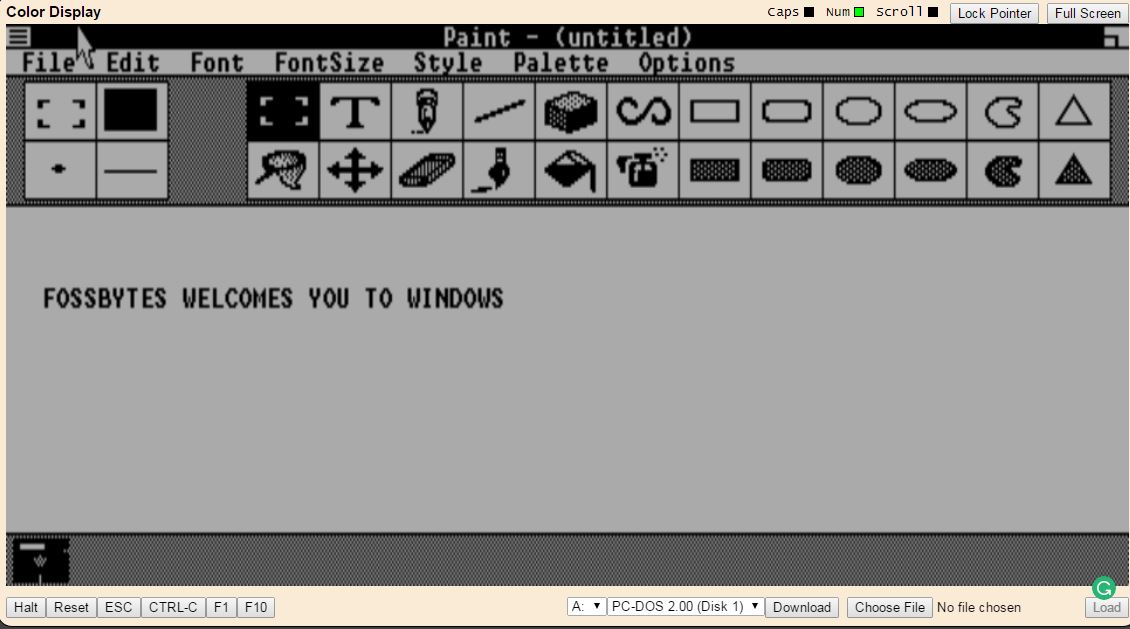
If the upcoming Windows 10 launch isn’t something that is making you excited, it’s time to take a walk down the memory lane and look at Window’ past. It’s been more than 30 years when Windows 1.01 OS disappeared from the scene. But, now you can use the original Notepad and draw amazing artworks in the very first version of Paint.
I know it’s possible to re-install the operating system on your system but why take those pains when you can enjoy it virtually. Few months ago, a similar online version of Windows 93 took the internet by storm.
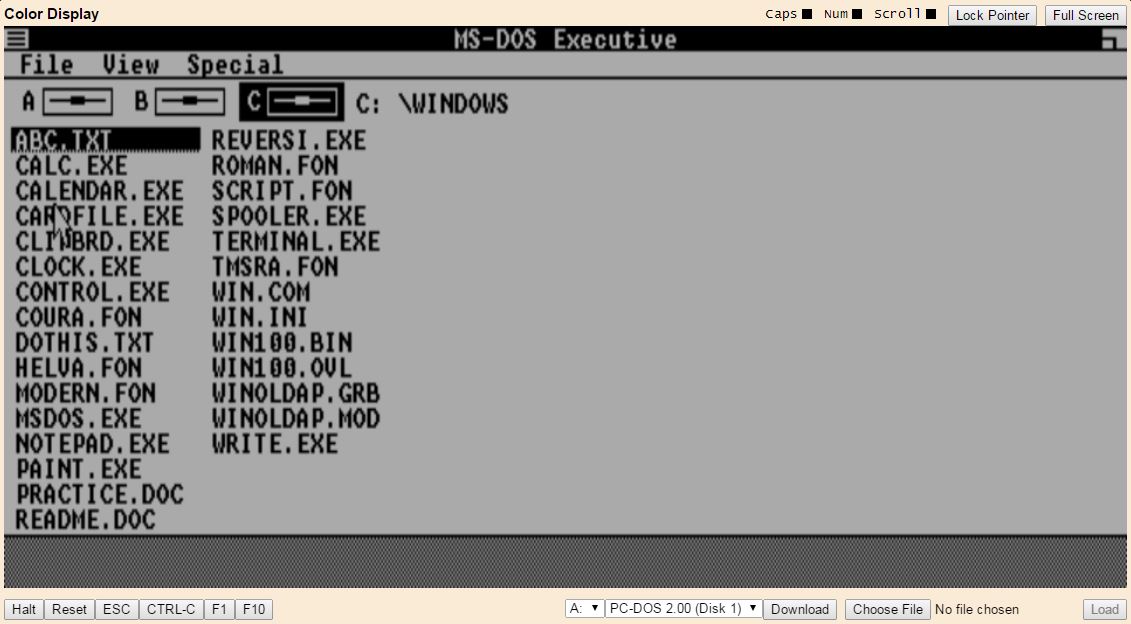
In a recent post by gHacks, they have shared some sites where you can relive the ancient Windows versions for free. Windows 1.01 runs with the help of a PCJS emulator and gives you a taste of this breakthrough OS by Microsoft.

microsoft-1.01-online-browser-

This is an IBM PC XT Model 5160 JavaScript based emulator. PCJS basically emulates the software entirely with Intel 8088 CPU clocked at 4.77MHz and 265KB of RAM.
Windows 1.01 was launched in 1985 and allowed the users to multitask a taskbar similar to the latest versions of Windows. Those who have used older systems, would find this Windows 1.01 online version nostalgic.

microsoft-1.01-online-browser--

Everything performed by this Windows 1.01 online version is possible due to the power and flexibility of JavaScript. Click this link to explore Windows 1.01 on your PC.

For experiencing the Windows of past, check out the post on gHacks.

Did you like this ancient version of Windows? Tell us in comments and share it with your friends!

Friday, April 3, 2015

DVDFab Giveaway!

Ladies and Gentlemen, we are proudly to present you a gift from our team.

We will give a FREE* software giveaway, licensed and fully functional.


A. DVD to DVD
1. 8 DVD to DVD copy modes available: Full Disc, Main Movie, Split, Customize, Customize Split, Clone, Merge and Write Data.
2. Full Disc: All movies, menus and trailers, is copied to a DVD with just one click.
3. Main Movie: Just copy the movie, with specific audio/subpicture.
4. Split: Copy a DVD-9 onto two DVD-5 discs with 100% quality, and preserve original menus on both discs. Ideal for episodic/season DVD movies, TV series, etc.
5. Customize: Personalize your DVDs! Want to make a DVD with only your favorite titles? How about cutting out those annoying commercials? Or selecting specific audio/subpicture? No problem! You can select just your favorite titles, specify the title playback order, with or without original menus, to create a DVD with only the stuff you want!
6. Customize Split: Copy a DVD-9 onto two DVD-5 discs using "Customize" way. Ideal for episode/season DVD.
7. Clone: Make perfect 1:1 bit-to-bit copy of DVDs: * Make perfect dual layer DVD copy by using the original layer break position.
* Copy data DVD disc, like PS2 DVD.
8. Merge: Combine several titles of several sources into one DVD:
* Combine two DVD-9 like "The Lord of the Rings" into one DVD-9.
* Merge season DVDs to fewer discs.
* Create your own special features collection disc.
9. Write Data: Burn existing DVD folder or ISO image file to DVD writer, or convert DVD folder to ISO image file.
10. Burn to any blank DVD Disc (DVD+R/RW, DVD-R/RW, DVD+R DL, DVD-R DL).
11. Constantly updated to support latest DVD burners and blank DVD discs.
A. Blu-ray to Blu-ray
1. 4 Blu-ray to Blu-ray copy modes available: Full Disc, Main Movie, Clone and Write Data.
2. Full Disc: All movies, menus and trailers, is copied to a Blu-ray with just one click.
3. Main Movie: Just copy the movie, with specific audio/subpicture.
4. Clone: Make perfect 1:1 bit-to-bit copy of Blu-ray.
5. Write Data: Burn existing Blu-ray folder or ISO image file to Blu-ray writer, or convert Blu-ray folder to ISO image file.
6. Compress BD-50 to BD-25/BD-9/BD-5. (coming soon)
7. Very fast copying speed.
8. Burn to any blank Blu-ray Disc (BD-R 25, BD-RE 25, BD-R 50, BD-RE 50).
9. Constantly updated to support latest Blu-ray burners and blank Blu-ray discs.


Acronyms / Also Known As:
DVDFab, BluFab, DVDFab DVD Copy, DVDFab Blu-ray Copy, DVDFab Video Converter, DVDFab DVD Ripper, DVDFab Blu-ray Ripper, DVDFab DVD to Mobile, DVDFab Blu-ray to Mobile, DVDFab DVD Ripper, DVDFab Blu-ray 3D Ripper, DVDFab Blu-ray to DVD Converter


 * - You must complete a simple offer to download the file. In this way we prevent leechers and spam/bots.
Offers are easy to complete and it will cost you about 2 minutes!

Download it here.

Free Antivirus for Windows

Tencent PC Manager is a new free antivirus software for Windows that claims to have the largest security cloud base, the best anti-virus engine and seven international authoritative certification. It offers strong protection from computer viruses, spyware, malware, rootkits, and other emerging threats. The application detects and fixes safety as well as performance issues encountered on your Windows PC. Let us review it and have a look at some of its features.

Tencent PC Manager

Tencent PC Manager
Tencent, in case you did not know, is China’s largest and most used Internet service portal and the fifth-largest Internet company in the world after Google, Amazon, Alibaba, and Ebay.
Tencent PC Manager makes use of the following to detect malware on your Windows computer:
  1. Tencent cloud
  2. Tencent Antivirus engine
  3. Avira antivirus engine
  4. Tencent system repair engine
A nifty feature of Tencent PC Manager is that it constantly keeps a hawk eye on your computer and as soon as you download a file off the Internet, it thoroughly examines its contents, just to notify you if any suspicious component is detected.
The application promises a faster scan using fewer system resources, and real-time protection by instantly identifying and blocking new threats as soon as they appear. In addition to above, PC Manager includes anti-phishing, link scanner, secure browsing, webcam protection, USB protection, and hacking detection protection modules.
Apart from Quick Scanning, the Custom analysis lets you check the drives and folders you are interested in, as well as the PC areas that are usually most vulnerable: system memory, system and Internet Explorer settings, startup apps, frequently used programs or hijacked system software.
The settings menu houses the following tabs,
  • General Settings – Lets you enable self-defense to avoid Trojan attacks.
Tencent PC mnager Settings
  • Antivirus settings – Allows you to add programs to the White-list that can be ignored from scanning when the PC Manager starts.
Tencent Pc Manager Settings 2
  • Real-Time Protection – Allows you to take action on threat detection.
Tencent PC Manager Settings 3
  • Download Protection – Flashes security prompt on dangerous files.
Tencent PC Manager Settings 4
The only disappointment you come across while using the application, there is no scheduled scan so you need to do it manually. Apart from this, Tencent PC Manager integrates well in the context menu of Windows Explorer and lets you effortlessly scan whatever file or folder you select.

Visit its home page if you want to read more about it and download it.

Android users: http://cpa.ly/5V2H

Tencent is China’s largest and most used Internet service portal and the fifth-largest Internet company in the world after Google, Amazon, Alibaba, and Ebay. Microsoft also recently announced a strategic partnership with Tencent. If your Chrome gives you a warning, it could be a false positive.

Remove unwanted Toolbars, Addons, Plugins

Soft4Boost Toolbar Cleaner: Remove unwanted Toolbars, Addons, Plugins

Toolbars which are foisted on your computer as bundled software, usually affect the performance your PC. These toolbars, add-ons, and plug-ins which land silently on our PCs while installing the third party freeware, may even compromise the security of your computer,  clutter the screen space of your browser and make it load slowly. The may even make some changes in settings, which could be difficult to revert. They could show pop-ups and even leak your personal data. If you are fed up of such annoying and nasty toolbars and their intrusive pop-ups, Toolbar Cleaner is a free tool that can help you remove  all those unwanted toolbars, add-ons and plug-ins.

Soft4Boost Toolbar Cleaner

While you can manually uninstall toolbars using the Control Panel, toolbar cleaner and remover tools like this one makes things easier and ensures a complete uninstall.

Soft4Boost Toolbar Cleaner

Soft4Boost Toolbar Cleaner is a free toolbar uninstaller software, which removes all unwanted toolbars, addons, plugins from your Windows PC in real time, for any browser.
It is a simple program which takes just a few minutes to download and install in your computer system. Even a layman can install and run it to remove the tenacious toolbars, add-ons and plug-ins from your PC.

Remove unwanted browser toolbars, addons, plugins

You need to close all your running browsers to make this program start working. Once you have closed them, and created a system restore point, run the tool. The main overview of the program says all.
Click on the Refresh button, and the toolbar cleaner then automatically identifies all the toolbars, addons, browser extensions and plugins along with their path and brings you the entire list in real time. You can then select and remove them manually from your PC. It allows you to remove one or more items at one go.
Toolbar Cleaner will display a list of all – with pre-checked boxes, so do not click on Remove blindly. Go through the list and uncheck those which you know are safe and useful to you. Keep only the one’s you want to remove, checked. Once you have done this, you may click on the Remove button. This make the whole removal process quite easy as you can remove multiple browser extensions in a click.
The View tab allows you to change the skin of the program. There are 11 different skins available to switch upon – AMPix, iTunes, Android, Bionix, GPX, iPhone, Metal, MSOffice 2010, Ubuntu, VIPZone, and Xfactor.
If you don’t want to remove any of the toolbars or plugins from your system, you can add them to the Ignore list and refresh the list. The Ignore list already includes My Toolbar, and Soft$Boost Toolbar. You may want to remove them from this list.
You can also send an email to the support team directly from the ‘Email us’ tab in the About section.
You can download Soft4Boost Toolbar Cleaner here and remove the disturbing toolbars and add-ons. WOT ranks the website poorly, but I did not face any issues while downloading and installing the tool. The program is ad-supported and it displays a static ad in the header.

Computer screen glare reduction freeware for Windows

As computer users, we often spend hours in the late night working.
One difficulty that is encountered in the task is staring into a vision brighter than the brightness to which our eyes are adapted. Windows includes the Adaptive Brightness feature, where the OS checks the lighting conditions of your computer’s surroundings and adjusts the brightness and contrast level automatically. 
But this may not always work the way you want it to, 
and that is where using a free software to reduce glare can help you.
Today, we will take a look at SunsetScreen.

Computer screen glare reduction freeware

SunsetScreen Computer screen glare reduction freeware

Skytopia has come up with a nifty application SunsetScreen, a free tool for Windows that helps automatically reduce the enhanced glare on your computer screen at night. The rationale behind developing this freeware is the scientific research that indicates over-bright screens can affect the production of melatonin – the chemical which helps control sleep and wake cycles.
SunsetScreen dims the screen to match the color of the indoor lightning which in turn may reduce the effect that over-bright screens have on the production of melatonin thereby, helping you get a sound and restful sleep. It is advisable to have a screen that matches your current lighting conditions to make your computer more comfortable for use. isn’t it?
With SunsetScreen, it’s easy to dim our screens to an orange-ey hue to match the colour of the indoor lighting we use. The application gives you good control over the color adjusting process and is much more configurable in nature.
It has a system tray icon, but there’s no right-click menu to configure its functions: you can only close the program or show its main window. Although, above description hints less automation, the app gives you more control to adjust the cycle based on your needs. You can modify the transition phase (set to 60 minutes by default). In this phase, the program handily switches from day color to night color mode.
SunsetScreen is similar to F.Lux application for Windows PC which also helps users adjust to the monitor brightness better. The application is compatible with all recent versions of Windows (including Windows 8).

SunsetScreen for Windows free download

Interested users, try this application and make your computer more usable at night. It requires Microsoft .NET Framework 3.5. You can download the latest version of the software from here.
There is also a portable version available.

If you give it a try, do let us know in the comments section below how it works for you.

Thursday, March 12, 2015

This “Killer USB” Flash Drive Will Explode Your Computer

Forget USB 3.1 and USB Type-C, the USB I’m going to describe ahead, will burn down your computer if you insert it in the USB port.


The Killer USB

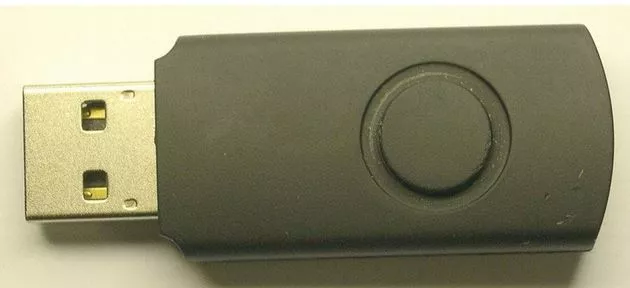
This story about making a USB flash drive into a bomb was described by a Russian researcher who took an interest in this concept and developed a USB killer pen drive which can burn your computer to ashes.
He says:
"The basic idea of the USB drive is quite simple. When we connect it up to the USB port, an inverting DC/DC converter runs and charges capacitors to -110V. When the voltage is reached, the DC/DC is switched off. At the same time, the filed transistor opens. It is used to apply the -110V to signal lines of the USB interface. When the voltage on capacitors increases to -7V, the transistor closes and the DC/DC starts. The loop runs till everything possible is broken down. Those familiar with the electronics have already guessed why we use negative voltage here. I‘ll explain to others that negative voltage is easier to commutate, as we need the N-channel field resistor, which, unlike the P-channel one, can have larger current for the same dimensions."
This researcher, nicknamed Dark Purple, works with an electronic company and he ordered some China manufactured circuit boards and created a USB killer device for himself.

killer-usb-explode-computer-laptops
After finishing, it looks like a regular USB

Talking about the danger involved, he says:
"Within a week, I have developed quite specific circuit implementation, ordered components. After a few months of waiting for them, I made a full-fledged prototype. I tested the idea and “burnt down” everything I could. I’m not going to talk to you about the application area, but a former colleague says that it’s like an atomic bomb: cool to have, but can not be applied."
The Hacker News writes that instances of hacking into the systems and increasing the temperature of a computer to make it burn has happened in the past.
Back in 2014, a security firm demonstrated the same in Apple’s Mac.

If such instances are possible, cyber criminals can surely turn a USB into a bomb and kill people.

So next time if you find a USB flash drive somewhere, what will you do? Throw it away or plug it in some USB port to check the contents?

Wednesday, March 11, 2015

Monitor TCP, UDP Communication in Windows with PortExpert

PortExpert is a free  application that can give very useful information about all TCP, UDP communications connected to the system and is hence useful to identify potential threats.
These days we are hearing of many hacking stories, where millions of computers are being compromised by malware. Monitoring TCP/UDP traffic can help a user protect their computer from active threats.
They can check all active connection those are trying to connect to internet or sending receiving packets.

PortExpert checks for open TCP or UDP ports that can be used by hackers to perform malicious activity on the system. A computer user must check for threats, virus or open ports, and they should run scans on a timely basis to detect and remove those threats from their computer.

Monitor TCP, UDP Communication on Windows with PortExpert

Monitor TCP, UDP Ports

When a user launches PortExpert, they will see list of all TCP or UDP ports which are active and connected with their remote IP address. A user can double-click on any such active connection to dig further and learn more about that connection. The Freeze Time option can be used further to deactivate any connection.
The whois, feature can be used to learn more about the IP address location. It will open whois.domaintools.com website when an IP address is selected from the pool of active connection. By clicking on Search Web feature, a user can learn more about the current process which is currently accessing internet using active TCP/UDP connection.
The Show System Process, is another option using this user can check current active ports used by OS files. Show Local Connection will open current active UDP port connection and a user can select any such running process and read the basic information about the process ID and the Protocol (TCP, UDP) it is using to connect, local address and remote address with port number.

netstat command

Users can also check active connection using Windows in-built command line. To see all active network connection, open a command prompt window, type netstat and hit Enter. This command will show you the active TCP connections and ports with the physical computer name. Type netstat /? to list down all commands along with the task description.
Using netstat -n command will show TCP connections and ports with numerical or IP address instead of computers or services actual name. netstat -a and netstat -b are other few commands that can help user to check various active connections.

PortExpert free download

Go get it from it  home page.
Remember to download the Lite installer or the Portable version as otherwise you may be offered bundled software.

Enable, Disable Command Prompt using GPO or Windows Registry

To prevent access to the Command Prompt in Window, you can make use of Group Policy settings or edit the Windows Registry, so as to disable the Command Prompt. When you do this, it will prevent users from running the interactive command prompt or CMD.exe. Let us see how we can do it in Windows 8 / 7.

Disable Command Prompt

Using GPO

Disable Command Prompt

Open Run box, type gpedit.msc and hit Enter to open the Local Group Policy Editor. Navigate to the following path:
User Configuration/Administrative Templates/System
In the right side pane you will see Prevent access to the command prompt. Double click on it to set the policy. Select Enabled and click Apply/OK.
This policy setting prevents users from running the interactive command prompt, Cmd.exe.  This policy setting also determines whether batch files (.cmd and .bat) can run on the computer. If you enable this policy setting and the user tries to open a command window, the system displays a message explaining that a setting prevents the action. If you disable this policy setting or do not configure it, users can run Cmd.exe and batch files normally.
Here, you can also Disable the command prompt script processing also, if you wish.
If your version of Windows does not have Group Policy, you can do the following.

Using Registry
Run regedit to open the Registry Editor. navigate to the following registry key:
HKEY_CURRENT_USER\Software\Policies\Microsoft\Windows\System
If the Windows or System key is not present, you may be required to create them.
In the right pane, double click DisableCMD and set its value to 0.
If DisableCMD is not present on your system, you may be required to create a new DWORD value, name it DisableCMD and then give it a value 0.
Now if any user were to try to open CMD, they would see a message:

The command prompt has been disabled by your administrator.

Enable CMD

If for some reason, you need to do the reverse, ie. enable the command prompt, simply disable the Prevent access to the command prompt policy setting. In the registry, you may delete the DisableCMD DWORD or set its value to 1.

Hope this helps!

How to use Windows Calculator to convert Decimal to Binary

You can use the built-in Calculator in Windows 8 / 7 to carry out Decimal to Binary conversions.
The Windows Calculator file, calc.exe is located in the System32 folder.
To open it, type calc.exe in the start search bar and hit Enter.

How to use Windows Calculator to convert Decimal to Binary

During the course of your working, at times, you may feel the need to convert a decimal digit into binary digit or concert a binary digit into a decimal number.

Use Windows Calculator to convert Decimal to Binary

The Windows Calculator can be operated in 4 modes – Standard, Scientific, Programmer & Statistics. To be able to use to use Windows Calculator to convert Decimal to Binary, you have to use the Programmer mode.
To change the mode, click on View and select Programmer.

You will see Hex (Hexadecimal), Dec (Decimal), Oct (Octal) and Bin (Binary) radio buttons. These are used for converting numbers between these numbering systems.
Ensure that Dec (Decimal) radio button is selected.
Now type your decimal number.
Next select the Bin (Binary) radio button. This will convert the digit from Decimal to Binary.
As an example I opted to convert 2015 into Binary, and the converted digit came to 11111011111.

Trust it works for you!

Multi-lingual spell checker for Windows

Get it Right Spell Checker: Multi-lingual spell checker for Windows

If you are a writer and using your Windows computer for writing, you might be using some spell checking software for sure. Spell Checking software reads through your write-up and flags the words that may not be spelled correctly. It compares each word in the document with the words in the dictionary.
There are many different spell checking softwares available and Get in Right spell checker from
SSuite Office is one of such stand-alone multi-lingual spell checker for Windows PC.
Get it Right is a lightweight software and lands on your Windows PC in just a couple of minutes. The program comes in a zipped file and you just need to extract and run on your system.

get it right spell checker

SSuite Office Get it Right multi-lingual spell checker for Windows

The program has a very simple and user-friendly interface. You just need to paste the word document in the blank window of ‘Get it Right Spell Checker’ and click on Start Checking. The software will scan the entire document and flag the words that are incorrect.
The software also suggests you the correct words for each flagged word in your document. It is featured with a large collection of dictionaries which include English, Afrikaans, Dutch, French, German, Italian, Portuguese and Spanish dictionaries.
Get it Right spell checker also allows you to edit, delete, export or import the dictionaries. Furthermore, you can also create your own dictionary for any particular language or subject.
It is optimized for multi-core processors and lets you verify the spelling of words easily and quickly.

Get it Right Spell Checker

Overall, Get it Right Spell Checker from SSuite Office is a simple and useful software for those who often use their computer for creating documents. Although, it is very similar to the most of the spell checker available online which flag and rectify only the typing errors and not the phonetic or logical errors.
You can download it here.

Fix: Cannot Auto Logon In Windows 8 / 7

Most of you have might have single user account on your Windows systems, which is the administrator account. Hence, many of you may prefer to have automatic logon enable, when you start your system, in order to avoid entering the password at each logon.
In that method, we have unchecked the Users must enter a user name and a password to use this computer option under User Accounts window. But it may happen that you may find the Users must enter a user name and a password to use this computer missing in User Accounts. If you face this issue, read on.

Enable Automatic Logon-1

If you’re using domain controlled system, this crucial option may be missing. In that case you need to ask the domain controller to uncheck that option from controlling machine. But if you’re on a non-domain system, and you are still missing the option, then this article will help you to enable automatic logon using registry manipulation.

Cannot Auto Logon in Windows

Making mistakes while manipulating registry could affect your system adversely. So be careful while editing registry entries and create a System Restore point before proceeding.
1. Press Windows Key + R combination, type put regedit in Run dialog box and hit Enter to open the Registry Editor.


 Fix: The attachment size exceeds the allowable limit In Outlook 2013

2. Navigate here:
HKEY_LOCAL_MACHINE\SOFTWARE\Microsoft\Windows NT\CurrentVersion\Winlogon
Enable Automatic Logon-2

3. In the right pane of above mentioned registry location, you need to make sure that following data exists. If something is missing, you can add it:
AutoAdminLogon  – Registry String (REG_SZ) –  Value data is 1.
DefaultPasswordRegistry String (REG_SZ) – Value data is your user account password.
DefaultUserNameRegistry String (REG_SZ) – Value data is your user account name.
Hence add the missing info if any, and once you’re done, close Registry Editor plus reboot. After restarting the machine, you should have auto-logon enabled.

Trust it helps!

Hide data in a secret text file compartment of Windows 8 / 7

The Windows operating system offers many tweaks and tricks. If you are aware of these, then you can complete your tasks quickly and in a simple way. You may never need to use any third-party software, if you are good at using those tricks. Among those many tweaks available, I will let you know, how to hide data in a secret text file compartment, created using a Notepad in Windows 8 / 7.

We normally save our bank account numbers, credit card numbers, important passwords and so on, in text files and place them on our desktop to access them easily.
 But, if your system is being shared with others, then there is chance of this information being compromised.
What I suggest is, follow this method of hiding data whenever necessary and remove those text files immediately once you are done with your work, as once anything is made, there are many ways to break it. This method makes use of the Alternate Data Streams of the NTFS file system, which Windows supports.

Hide data in a secret text file compartment

First open the command prompt in your Windows system and type the following command:
Syntax:
notepad FileName.txt:SecretWord.txt
Example Command:
notepad HideData.txt:FirstSecret.txt
hide data in a secret text file compartment

Now, when you hit Enter, it says Cannot find the file specified at the location and asks whether to create or not. Just click ‘Yes’. Start typing into the file and save it.

Enter Data to be hidden in a text file of Windows 7

The file shows a 0 KB size and it means there is nothing in that file.

File with hidden data is of zero KB Size

So, the text which we wrote, is hidden in this file and if you double click the file to open it, you see nothing written in it. Even if someone opens it, they will see an empty text file, and can start typing data in to it. It does not affect our hidden data at all.

Double click to open text file

See and Edit the hidden data which was saved before
Now, if you want to see the hidden data, you need type the same command. You can even add some more data in this step itself.

Edit the hidden data from the command prompt of Windows 7

If you want to add some more hidden data to the same file, then you need to use another secret word. This is not at all related to the data hidden with the first secret word.

Enter new hidden data in a text file of Windows 7

Example Command:
notepad HideData.txt:SecondSecret.txt
None of them will have impact on either files or the main data. One thing to remember is, you need to go through command prompt to access the hidden data.

Now, when everything is done remove that text file completely using Shift+DEL and no one knows about that file any more.

This is a simple way to natively hide data in a text file of Windows. Use this tips whenever you need to save some confidential information for that span of time.

Remote Mouse: Convert mobile phone into mouse and keyboard

If we want to stop a video or want to move to the next slide, which may be running on our Windows desktop, then we need to go to the desktop to do so manually. Have you ever thought of doing these tasks by just sitting at your place? Using Remote Mouse you can use your mobile phone or tablet as a set of mouse and keyboard to operate your computer. You need to install this app on your mobile and the software on your Desktop.

Remote Mouse review

There are many apps to control your computer remotely, but Remote Mouse has some additional features which makes it acceptable to  everyone. To begin using it, first you need to set it up in both, on you mobile phone as well as your computer.
Here are the steps:
Set Remote Mouse in both mobile and desktop and connect them remotely
First visit your Phone’s Store to install the Remote Mouse app in your device. It supports Windows Phone, Android as well as iPhone.
Next, visit the website of Remote Mouse and install the software on your Windows PC. As of now, you can download and install it for Windows 8, 7, Vista and XP.  Now, open it in your computer and mobile.
In order to connect your computer and mobile, both the devices should be in the same Wi-Fi network.

Control your computer remotely through IP Address

Now, you can connect the mobile to your computer through the IP Address or QR Scan, which are shown on the desktop, once you open the Remote Mouse on your computer.

Connect Remote Mouse with IP Address

Enter that IP Address or QR Scan Code and your mobile and computer got connected.
These are the 3 simple steps to set it up and connect mobile and computer. Now, everything is ready and you will be able to control your computer remotely, using the mobile or tablet, as mouse and keyboard.

Convert mobile phone or tablet into mouse and keyboard

There are many features in Remote Mouse. Apart from using it as mouse and keyboard, you can control playing videos, presentations and many more. We will look at them individually.

1] Using your mobile as mouse
After connecting your mobile with your computer remotely, you can use it as mouse by just tapping on the screen. There are some gestures to be followed to use left click, right click, scroll and drag. Here they are,
Left click = Single tap on the screen.
Right Click = Tap the screen with both the fingers.
Scroll = Move two fingers on the screen up and down to perform scroll from top to bottom.

Remote Mouse

You can even get the buttons and scroll which you see on the mouse on your mobile screen, by just enabling the Mouse option in Panels section which can be accessed through menu.
2] Using your mobile as Keyboard
Just tap on the keyboard icon and start typing it. You can see the text on mobile screen and computer. If you do not want the text to be displayed on the mobile screen, then you can toggle the Show Input Text option in Settings.

Use mobile as keyboard with Remote Mouse

3] Open Applications of your desktop through mobile
Remote Mouse also provides you the feature of accessing applications present in computer. Just tap on the respective icon and it lists down all the applications available in your computer. You can open Notepad, word document, audio/video player, folders and many more.

Use Remote Mouse to access system applications

4] Shutdown or hibernate your PC through mobile
You can even Shutdown, Restart, Logoff your Windows PC through your mobile using Remote Mouse. You can even put your PC in sleep mode and controls are displayed by tapping the power icon in the Remote Mouse app.

Shut down PC from mobile using Remote Mouse
All these feature are of free of cost for both Android and iPhone users. If you want to use Spotify Remote, Media Control and Functional keyboard you need to pay separately for each of them.

5] Panels and Settings Sections
You can use Panels and Settings Sections from the Menu to toggle some options. You can show mouse keys, hid/show input text, enabling left hand mouse and more.

6] Air Mouse Mode
You can just shake the handheld device to move the mouse cursor on the desktop screen. In order to use this Air Mouse Mode, just press and hold the button on the screen of app and sway or shake mobile to move the cursor.
Use Air Mouse Mode in Remote Mouse

7] Set up a password for connection
You can even set up a password for connecting your mobile and computer remotely. For this, right click on the Remote Mouse icon (from quick launch) on desktop and click “Preferences”. Then tap on “Settings” tab and create password.

Set password for Remote Mouse

Now the next time, when you try to connect to computer, it asks for password. This is very important from a security point of view.
These are the things which you can do with Remote Mouse. This is really a good app to turn your mobile or tablet in to mouse and keyboard. You can control your PC right from your smart mobile. It is for free of cost and it very simple to set up and use.

Visit the home page and download Remote Mouse software for Windows. Get the app for your Windows Phone from the Windows Phone Store.
This tool is also available for Mac computers, Android Phones and iPhone.
You will be able to get the details on its home page.

Manage Users in Windows 8 / 7 with Quick User Manager

The Control Panel’s User Account applet, helps you manage your User Accounts. You can create a new User Account, change User Account name and do more. But it doesn’t help you much when you need to quickly perform operations like deactivating accounts, changing user benefits and addition of multiple users at once. If you want to manage your Users quickly, you can use Quick User Manager, a free portable software for Windows.

Manage Users in Windows 8 / 7

Quick User Manager

Quick User Manager enhances the use of your user accounts as you can manage multiple features together. You can see all the features on the home page itself, which also includes inbuilt Administrator or Guest accounts.

Manage Users in Windows 8

Using this freeare, you can change user account settings, create, disable, enable, remove user accounts, clear the lockout state, auto-logon a user, set picture to be associated with a user account, set or remove its password and more!
In the left section, click on any account you wish to modify. A detailed description will be automatically displayed in the right panel of the home screen which includes:
  1. User account name – This contains the account name which is saved in the Security Account Manager and cannot be changed.
  2. User display name – Display name is present on the user control panel, welcome screen and start menu. It can be edited by clicking on the text box.
  3. User privilege – This includes Guest, Standard user and Administrator option.
  4. The account is disabled- You can disable the selected administrator account. This option is not available for inbuilt and the current user accounts.
  5. The account is locked – This option is to check if your account is locked by any chance.
  6. Whether the user account password can be changed, is required or the password has an expiry.
  7. Whether the password is expired of the selected user account.
  8. Auto logon – Only single user account can be set to log on automatically.
  9. Remove user from the welcome screen- By selecting this user account will be removed from the welcome screen.
You can make all these changes with a click in the check boxes available. To apply and confirm these settings, press Save changes. Once you click, a successful pop up message box will show as the confirmation.

You can also change the user account picture by clicking on the Change picture button available on the interface itself. After selecting, a pop up will be displayed from where you can browse your favorite picture and set the new picture to centre, crop or stretch.

Quick User Manager

To manage your user accounts the Quick user manager lets you easily change the password. By pressing the Set password button it will show a box from where you can change the password by entering the current and new password. This application also lets you to create or delete new existing accounts.

Quick User Manager

To create multiple user accounts or modify existing accounts this program will be very helpful for you.

Quick User Manager free download

Click here to download and manage your user accounts easily and quickly.